
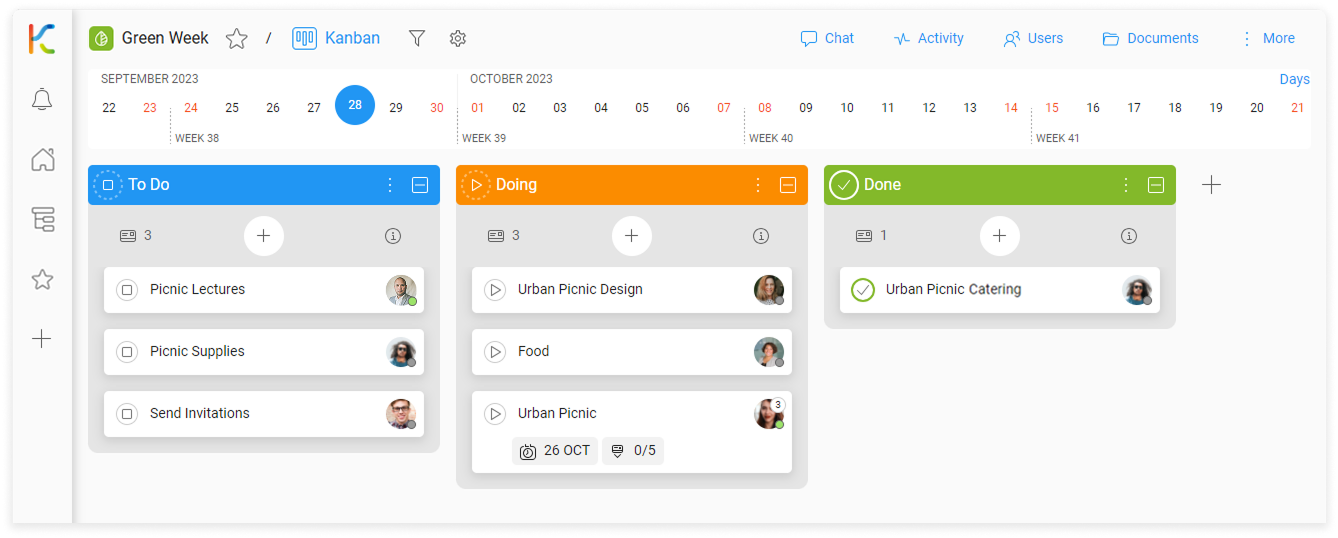
In our sample workflow, we have three card statuses, each with a different status role, indicating different stages in the task pipeline. However, you can add more statuses as needed.
Card status roles:
 Not started – The default initial status. It indicates tasks that are not currently being performed.
 In progress – This status is used to indicate that a card is already in progress.
 Completed – This status indicates that the card has been completed.
  Information – A status used to locate cards that contain important information but are not executable.
 Canceled – A status for cards that have been stopped and cannot be completed.
Cards can be organized in a personalized way using custom fields. They allow you to create and define specific tags that are relevant to your project or task.
Custom fields are:

Follow the video step-by-step
Open your space using Sidebar and ![]() Workspaces & Spaces to follow the instruction.
Workspaces & Spaces to follow the instruction.
Card statuses
To rename the card status:
- Select the card status name, on a pop-up window enter the new name, an then select Save.
To change the card status color/role:
- On the card status name bar, go to More (the three-dots menu)
- Go to Role/Color, and select desired option.
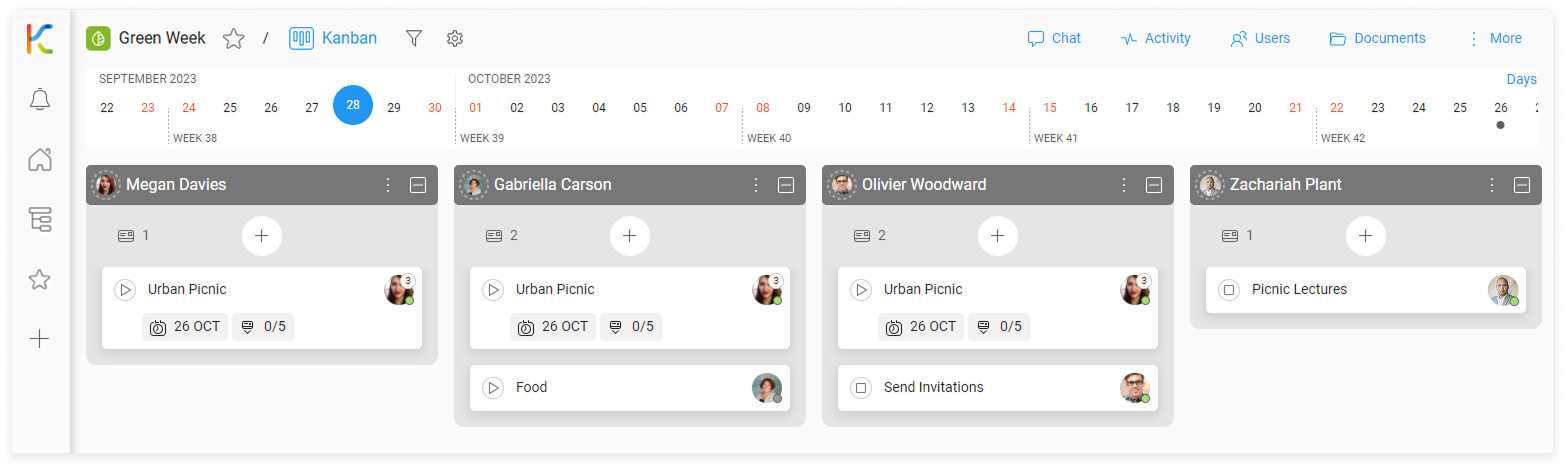
Card grouping
To change the card grouping:
- On the top space bar, go to
 Settings > Horizontal grouping, and then select the way of card grouping.
Custom fields
To create a label:
- Open a card.
- On the card details section, in the Custom fields area, select the + button.
- On the pop-up window, select + Create, enter the label name, and then select Create.
To add a label to a card:
- Open the card.
- On the card details section, in the Custom fields area, select the + button.
- Select the label from the list.
OR
- On the top space bar, select Settings > Horizontal grouping > Labels.
- Drag a card and move it to the desired label grouping.
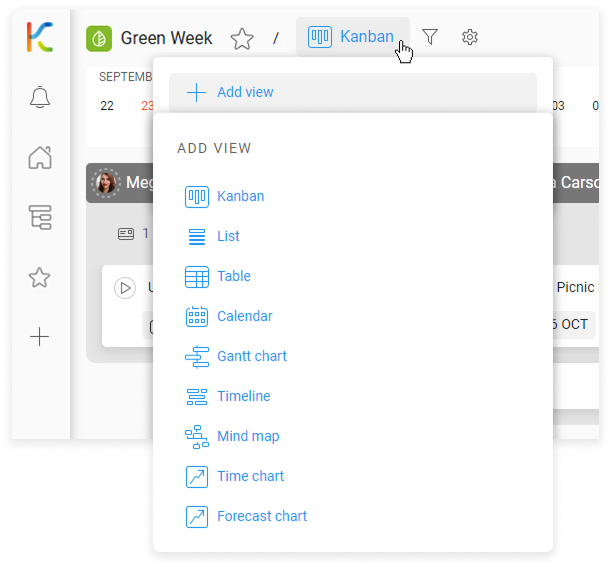
Display settings
Follow the video step-by-step
Open your space using Sidebar and ![]() Workspaces & Spaces to follow the instruction.
Workspaces & Spaces to follow the instruction.
Card statuses
To rename the card status:
- Select the card status name, on a pop-up window enter the new name, an then select Save.
To change the card status color/role:
- On the card status name bar, go to More (the three-dots menu)
- Go to Role/Color, and select desired option.
Card grouping
To change the card grouping:
- On the top space bar, go to Settings > Horizontal grouping, and then select the way of card grouping.
Custom fields
To create a label:
- Open a card.
- On the card details section, in the Custom fields area, select the + button.
- On the pop-up window, select + Create, enter the label name, and then select Create.
To add a label to a card:
- Open the card.
- On the card details section, in the Custom fields area, select the + button.
- Select the label from the list.
OR
- On the top space bar, select Settings > Horizontal grouping > Labels.
- Drag a card and move it to the desired label grouping.