
")
Follow the video step-by-step
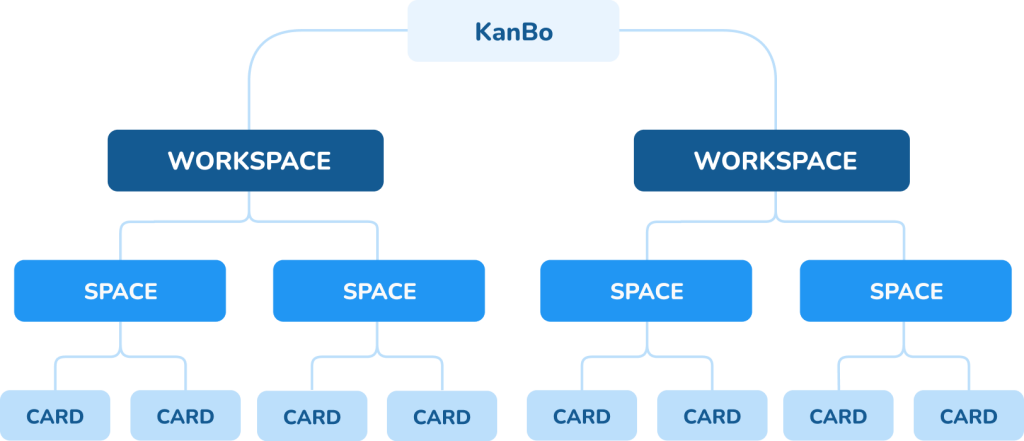
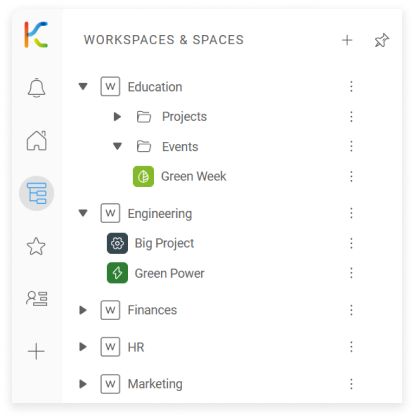
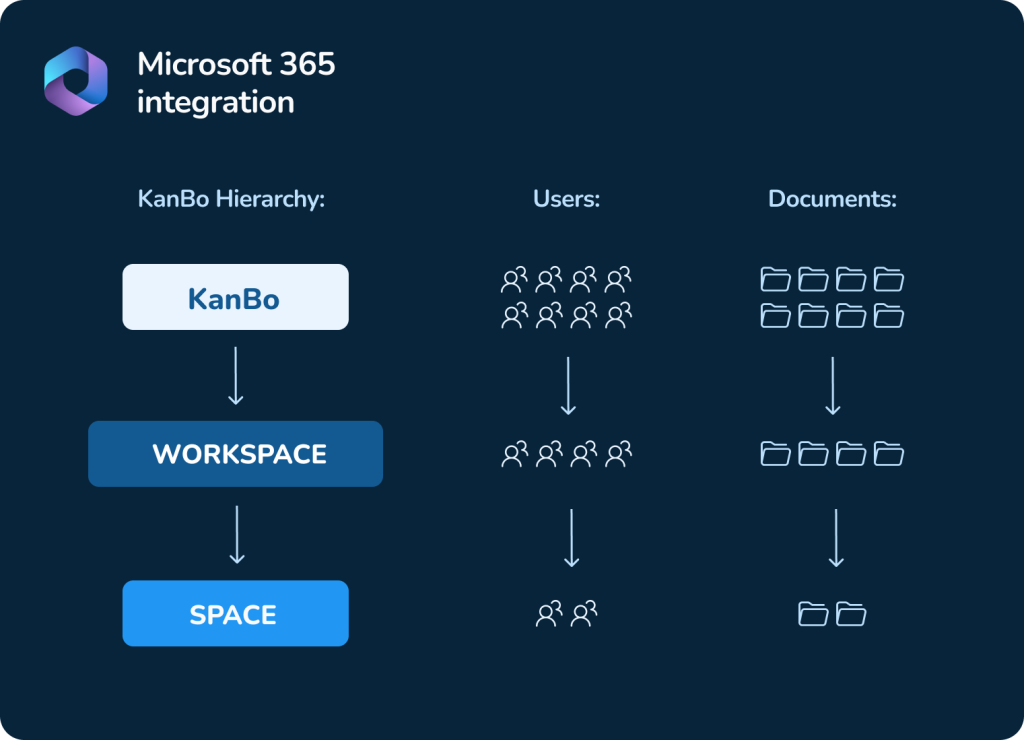
Create a workspace
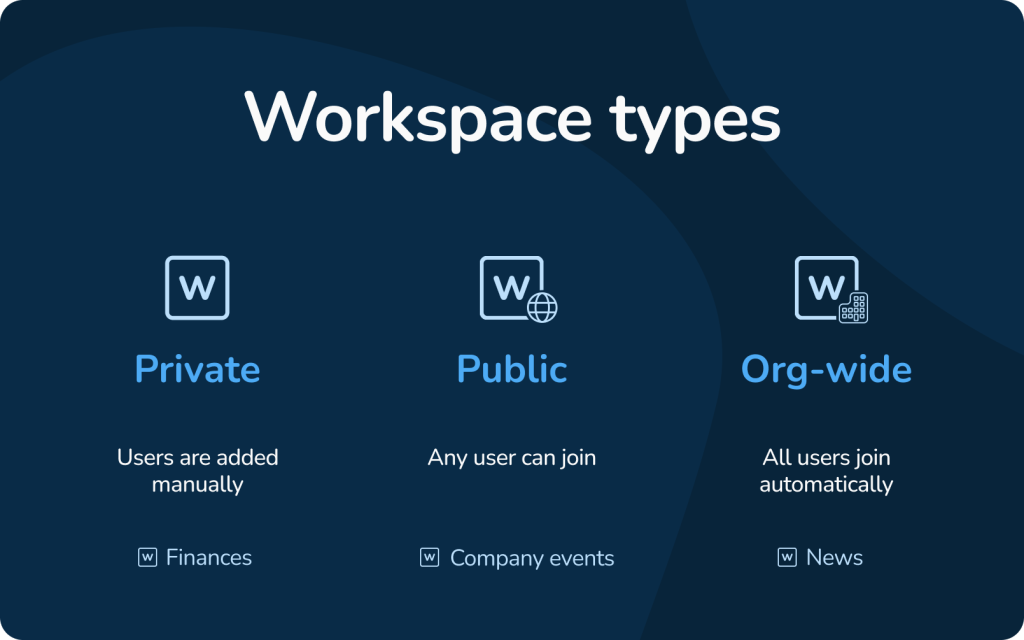
To create a private workspace:
- On the Sidebar, select the
 icon, and then select
  Workspace.
 - Enter the name, and then select Next.
- Select Create a new Office 365 Group with MS Team (optional), and then select Next.
- Select Private type of workspace, and then select Next.
- Confirm with the Create workspace button.
Add workspace users
To add workspace users:
- On the Sidebar, select the
 Workspaces & Spaces icon, and then find and select the workspace.
 - On the chosen user level section, select Add user.
- Select one or more users, and then confirm your choice with the + Add selected button.
Create a space
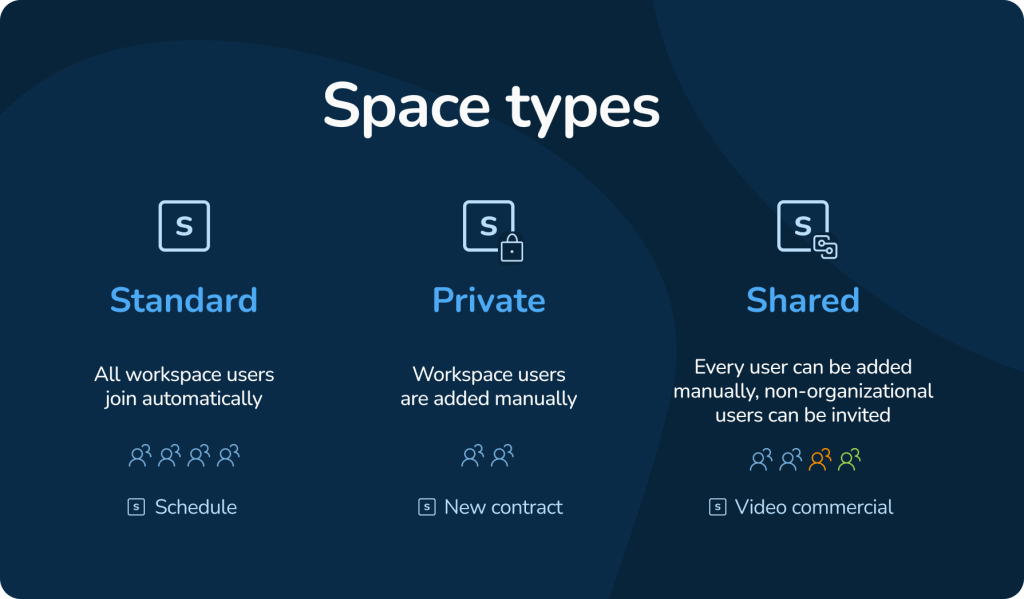
To create a standard space:
- On the Sidebar, select the Workspaces & Spaces icon.
- On the desired workspace, go to More (the three-dots), and then select + Add new space.
- Enter the space name, and go Next.
- Select the space color and avatar, then go Next.
- Choose if you want to connect your space with Microsoft Teams (optional), and then select Next.
- Select the standard space type, and then go Next.
- Choose the space template (default or custom), then select Next.
- Confirm the space review with the Create space button.
All workspace users are added to a standard space automatically.
To create a private space:
- On the Sidebar, select the Workspaces & Spaces icon.
- On the desired workspace, go to More (the three-dots), and then select + Add new space.
- Enter the space name, and go Next.
- Select the space color and avatar, then go Next.
- Choose to connect your space with Microsoft Teams, and then select Next.
- Select the private space type, and then go Next.
- Choose the space template (default or custom), then select Next.
- Confirm the space review with the Create space button.
Then you can add space users manually.
To create a shared space:
- On the Sidebar, select the Workspaces & Spaces icon.
- On the desired workspace, go to More (the three-dots), and then select + Add new space.
- Enter the space name, and go Next.
- Select the space color and avatar, then go Next.
- Choose to connect your space with Microsoft Teams, and then select Next.
- Select the shared space type, and then go Next.
- Choose the space template (default or custom), then select Next.
- Confirm the space review with the Create space button.
Then you can add space users manually.
Adding space users
To add space users to private or shared space:
- On the Sidebar, go to Workspaces & Spaces, and then select the desired space.
- On the top space bar, go to the
 Users section.
 - Go to Add user in the desired level access section.
- Select one or more users, and then confirm with the + Add selected button.
Document sources
To open the document source:
- On the space top bar, go to
 Documents, select More (the three-dot menu), and then select
  Go to source.
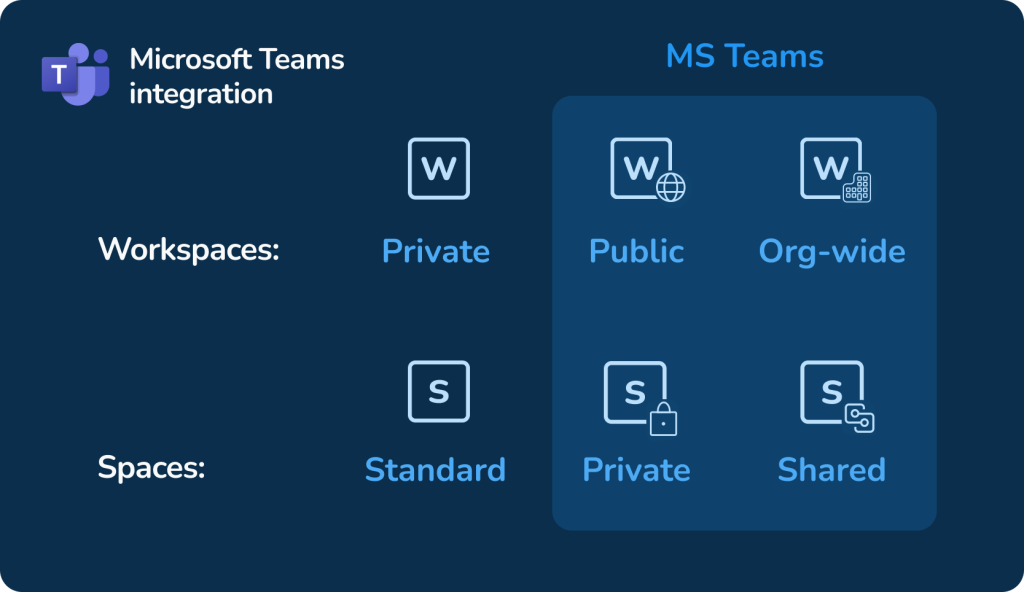
Microsoft Teams integration
To see the connection with MS Teams:
- Open MS Teams.
- Select the team corresponding with the workspace in KanBo.
- On the selected channel, go to More (the three-dots menu), and then select
 Manage channel.
Follow the video step-by-step
Create a workspace
To create a private workspace:
- On the Sidebar, select the icon, and then select Workspace.
- Enter the name, and then select Next.
- Select Create a new Office 365 Group with MS Team (optional), and then select Next.
- Select Private type of workspace, and then select Next.
- Confirm with the Create workspace button.
Add workspace users
To add workspace users:
- On the Sidebar, select the Workspaces & Spaces icon, and then find and select the workspace.
- On the chosen user level section, select Add user.
- Select one or more users, and then confirm your choice with the + Add selected button.
Create a space
To create a standard space:
- On the Sidebar, select the Workspaces & Spaces icon.
- On the desired workspace, go to More (the three-dots), and then select + Add new space.
- Enter the space name, and go Next.
- Select the space color and avatar, then go Next.
- Choose if you want to connect your space with Microsoft Teams (optional), and then select Next.
- Select the standard space type, and then go Next.
- Choose the space template (default or custom), then select Next.
- Confirm the space review with the Create space button.
All workspace users are added to a standard space automatically.
To create a private space:
- On the Sidebar, select the Workspaces & Spaces icon.
- On the desired workspace, go to More (the three-dots), and then select + Add new space.
- Enter the space name, and go Next.
- Select the space color and avatar, then go Next.
- Choose to connect your space with Microsoft Teams, and then select Next.
- Select the private space type, and then go Next.
- Choose the space template (default or custom), then select Next.
- Confirm the space review with the Create space button.
Then you can add space users manually.
To create a shared space:
- On the Sidebar, select the Workspaces & Spaces icon.
- On the desired workspace, go to More (the three-dots), and then select + Add new space.
- Enter the space name, and go Next.
- Select the space color and avatar, then go Next.
- Choose to connect your space with Microsoft Teams, and then select Next.
- Select the shared space type, and then go Next.
- Choose the space template (default or custom), then select Next.
- Confirm the space review with the Create space button.
Then you can add space users manually.
Adding space users
To add space users to private or shared space:
- On the Sidebar, go to Workspaces & Spaces, and then select the desired space.
- On the top space bar, go to the Users section.
- Go to Add user in the desired level access section.
- Select one or more users, and then confirm with the + Add selected button.
Document sources
To open the document source:
- On the space top bar, go to Documents, select More (the three-dot menu), and then select Go to source.
Microsoft Teams integration
To see the connection with MS Teams:
- Open MS Teams.
- Select the team corresponding with the workspace in KanBo.
- On the selected channel, go to More (the three-dots menu), and then select Manage channel.